
Wire Bookmarks
These techniques can be adjusted to produce endless designs. See the bookmarks area of the shop for examples.
Tools you will need: the usual suspects.
Pliers: flat-nosed, round-nosed, rubber, and bale-making pliers are helpful
Flush cutters
Ball peen hammer and steel block
Round mandrel (ring mandrel works well)
Ruler

Materials
Stone of choice. Labradorite pictured.
3 lengths of 20 ga square wire, about 18” each
1 length 16ga or 18ga round wire, between 18”-25”, depending on bookmark size.
Various lengths of 20 ga half-round wire: 12”, 9”, and 6”
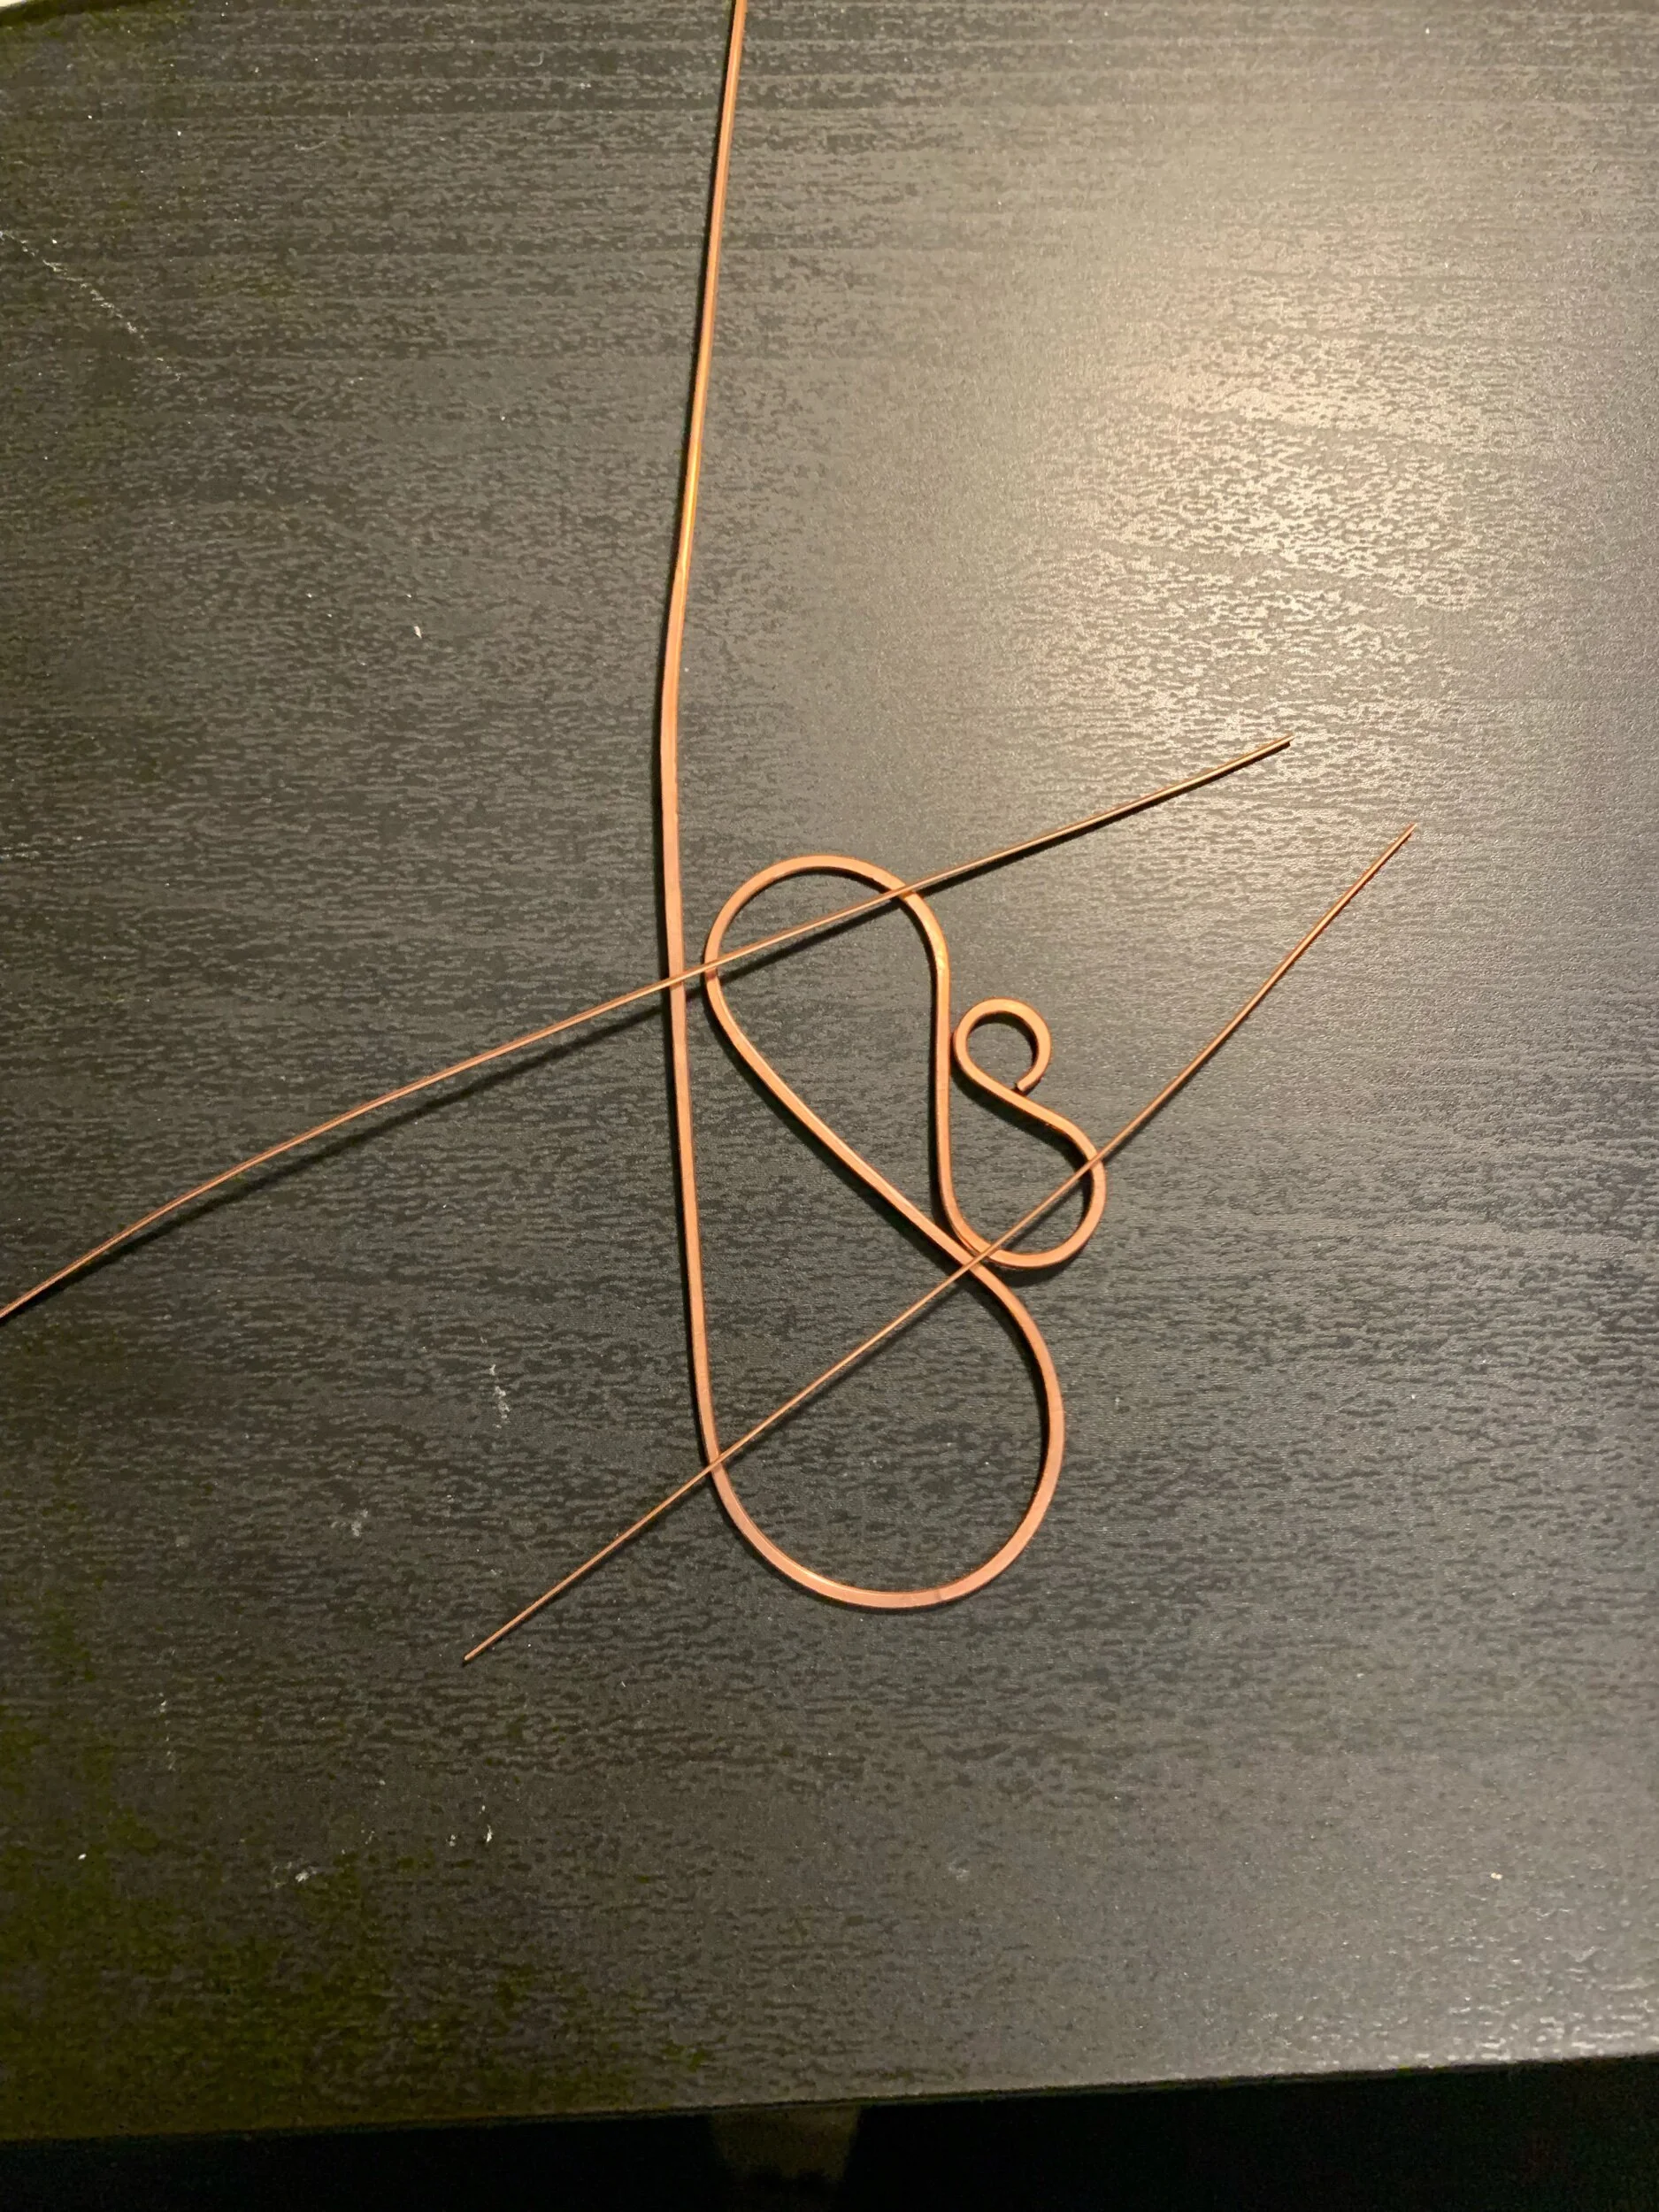
The first step is to create the anchor that goes inside the pages of the book. Start with your 18ga or 16 ga round wire. 18 ga works well for a smaller, simpler bookmark as pictured here. 16ga round wire works best for more hearty designs.
Create some swirls using bale-making pliers and a graduated round mandrel, like a ring mandrel. Pictured here is a smaller bookmark with four loops. For a larger bookmark I typically do five loops using 16ga wire.
hammer the pattern flat using your ball peen hammer and steel block. This part of the bookmark will go between the pages of a book.
Use 20 or 22 ga half-round wire to secure the loops together. flatten the bindings with pliers.
use a ruler and a sharpie to measure 4” (18ga smaller bookmark) or 5” (16ga larger bookmark) from the bottom of the loop pattern up the length of the frame wire. Mark that spot and a spot 1” higher. This one-inch space will become the top of the bookmark that spans the spine of the book.


Now that you have created the anchor, you will create the frame for the stone. The top of the frame, where the stone will sit, should be oriented so that the anchor loops are pointing straight upward. See the photos below.
5. Leave some space below the 1” space you marked with the sharpie and make a bend in the frame wire. This space can be as small as 1/2” or as much as 2” depending on how far down the spine of the book you want the stone to sit.
6. Shape a frame for the stone you are using. The bottom of the frame should peek below the bottom of the stone, and the upper part of the frame should be a good rest for the back of the stone.
7. Hammer the stone frame. This step both hardens the wire to provide rigidity and flattens the round wire to allow easier wrapping later.
8. Use the 6” length of 20ga half round to bind the frame together. Remember which side is “up” that the stone will sit on. If I were making this particular design again, I would probably use a 12” length of half-round and leave a long tail on the top of the frame to use later in step 15.


Next, you will create the setting for the stone.
9. Use the 3 lengths of 20 ga square wire and bind them tightly with the 12” piece of half-round 20 ga wire. Wind between 4-8 times around. More loops will be added in a later step, so don’t go too far. For now, both ends of the half-round wire should be pointing down.
10. Shape the setting in a U shape around the stone.
11. Place the shaped setting onto the bottom of the frame, then continue wrapping the half-round wires around both the frame and the setting, securing the bottom of the U shape into place.
12. Wrap an equal number of times around each side, flatten the wraps with pliers, and end with both half-round wire ends pointing upward. If you want to trim these ends, you will only need 3-4” to finish the wrap later.


Time to set the stone!
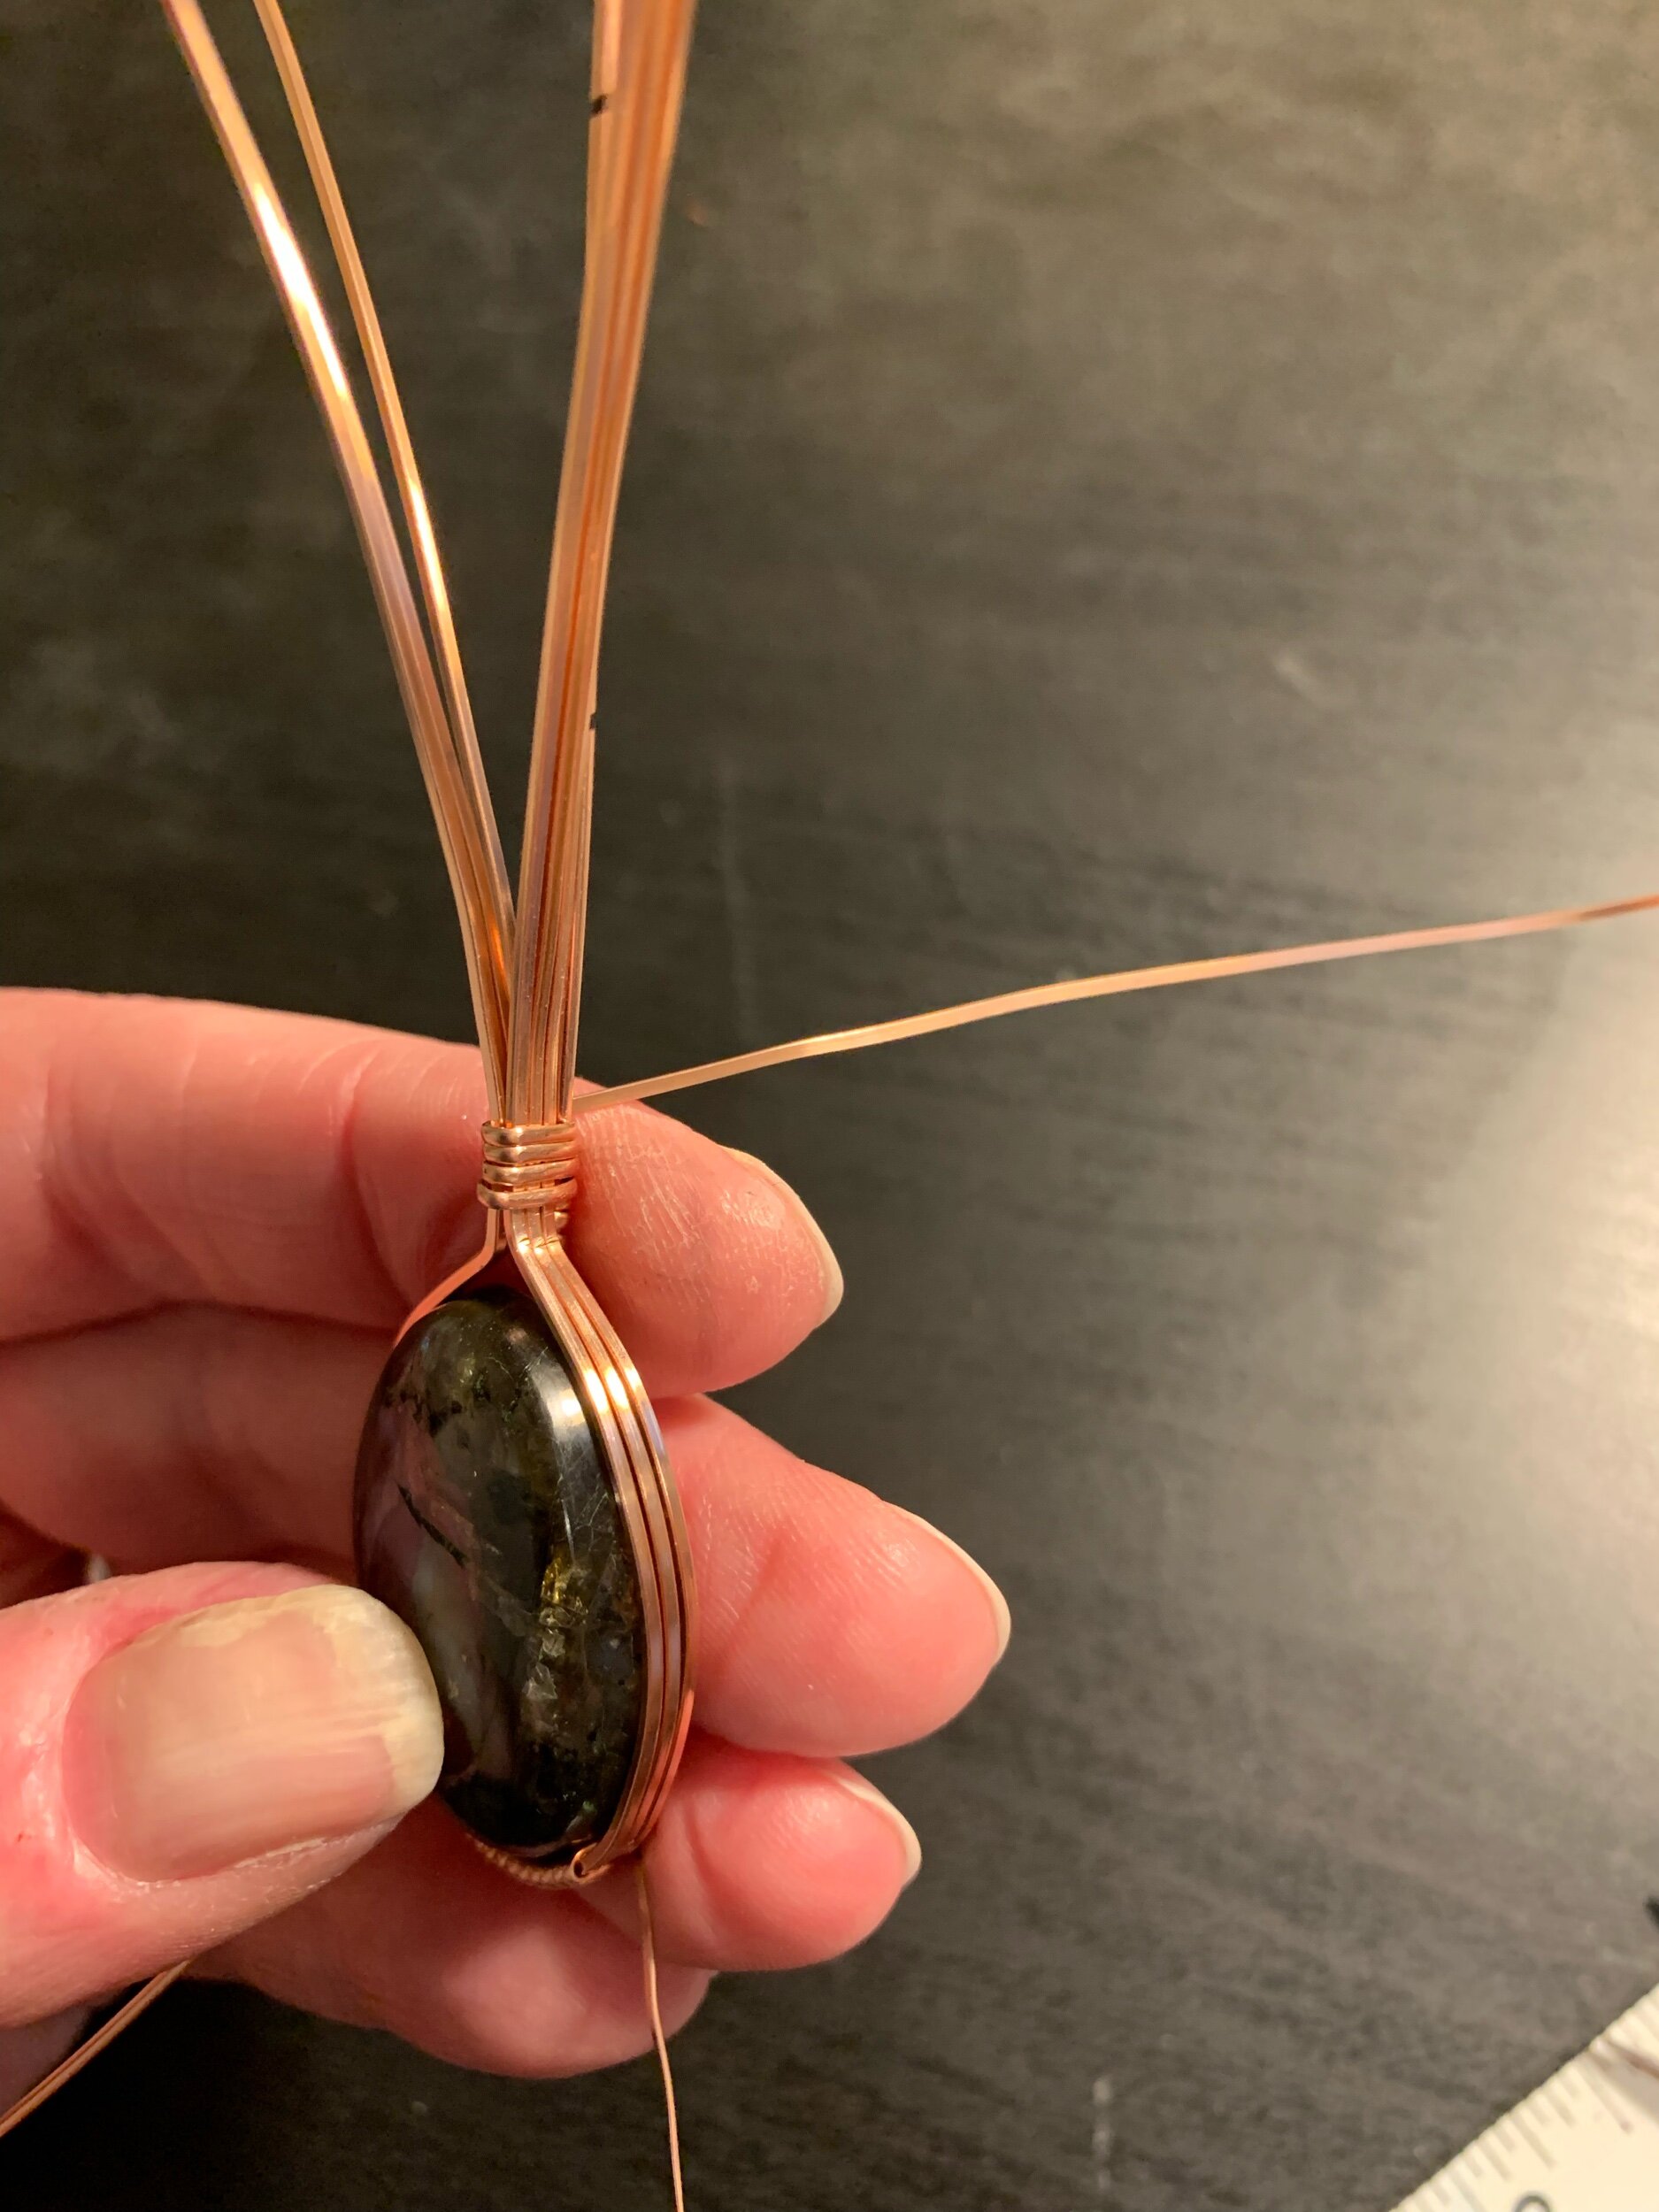
13. Place the stone in the U shape of the setting, which is now secured to the frame.
14. Bend the three setting wires around the stone so they meet at the top.
15. Use the 9” length of 20ga half-round wire to bind the six setting wires together with the frame wire. I typically wrap a couple of times around just the frame wire to anchor the wrapping wire before wrapping around all seven frame and setting wires. If you thought ahead during the design phase or step 8, you might have a wire already attached to the frame that you can use. During this step, you will want to keep the six setting wires organized and straight. Use pliers to flatten and tighten the wrapping wire as needed.
16. After a few wraps around all seven wires, pull the six setting wires forward and out of the way, then continue wrapping up the frame wire at least 3-4 times around or all the way up to the first Sharpie mark.


Arrange the wires in preparation for creating the decorative swirls.
17. Separate the three setting wires on the sides of the stone, pulling the top wire up over the curve of the stone to secure it in place.
18. Separate the tops of the six setting wires: front two to the right, middle two to the left, back two to the right. You can do this the opposite direction, of course, but the idea is to alternate.


Time to twirl!
19. Bend the front two wires down, across, and create a loop. Your thumbs are the best shaping tool for this step.
20. Place twirls, swirls, and loops wherever you want. Get creative! In this one, I used the third (backmost) set of wires to create more volume at the top of the stone rather than covering more of the stone-front with loops.


Secure the loops to the frame.
21. When the wires are placed how you want them, trim the ends with your flush cutters. Cut the ends of the wire at an angle to create a tapered effect. This creates nicer swirl ends than a blunt, square end would.
22. Use the tips of your round-nose wire to create very small loops. Bale-making pliers with a 2mm tip and a 3mm tip also work well for creating different sized finishing spirals.
23. Use the ends of the half-round weaving wire that was used to secure the setting to the frame to secure the finished spirals to the top wire of the setting. I typically thread the wire through to place it, then pull it tight with my flat-nose pliers. When doing this, be sure to hold the frame wire in place because it is easy to pull it out of position. Continue a few wraps up the top setting wire to secure it.
24. Do the same on both sides. You’re almost done!


Finish the bookmark.
25. Remember those two sharpie marks 1” apart? Make a 90 degree bend at each one, creating the bookmark shape.
26. Hammer any unhammered portions of the anchor wire that goes inside the book.
27. Adjust the shape as needed to straighten the anchor wire and top portion of the bookmark.
28. Finish and polish the bookmark as desired. I use liver of sulfur, a brass brush, and a sunshine cloth to polish.
29. Pick up a good book and start reading!


