
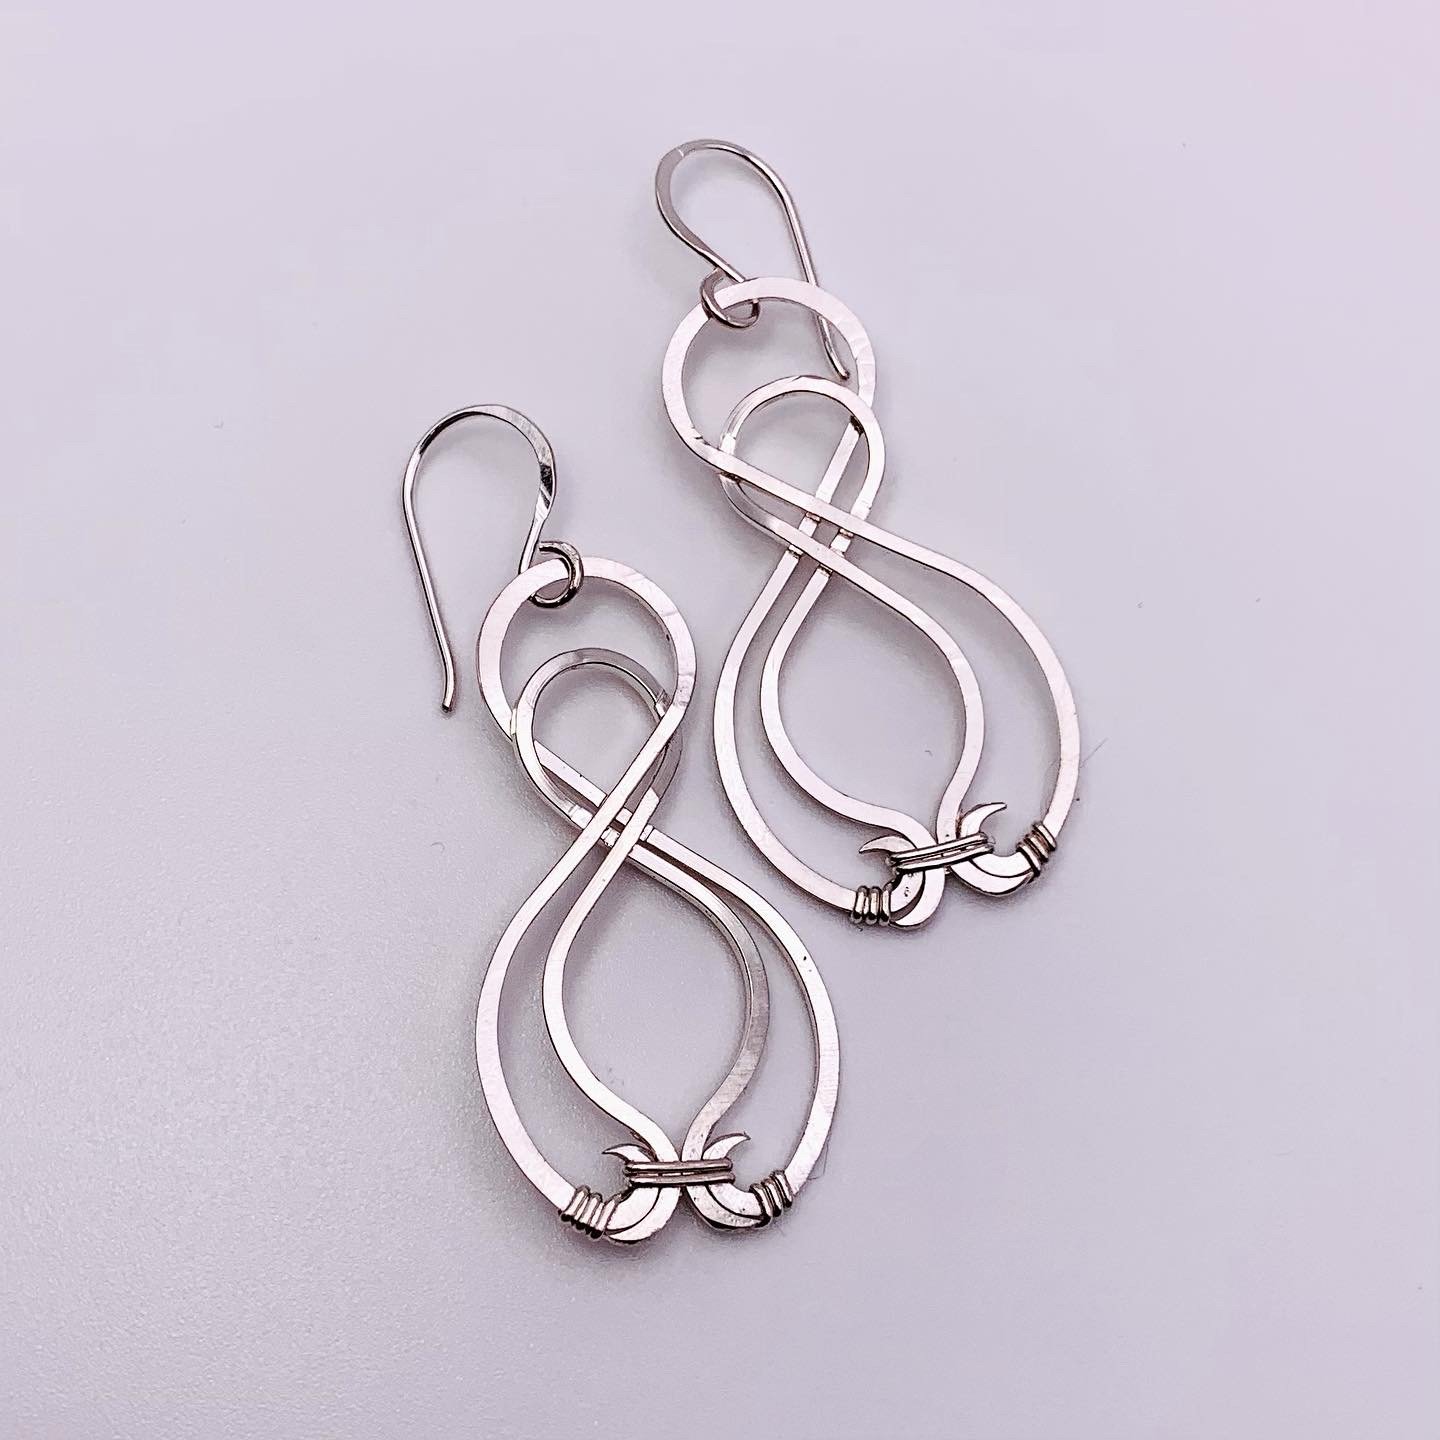
Infinity Earrings
These elegant, sophisticated earrings are magic in copper or silver. Elevate the design by hanging a faceted gem from the bottom. See the faceted gem earrings tutorial for a prong setting that is endlessly adaptable.

Tools & Materials
18 ga square wire, dead soft: 2 lengths 5.5”, 2 lengths 4”
22 ga half-round wire, dead soft: 2 lengths 4”
20 ga round wire, dead soft: 2 lengths 4cm
Measuring tape & fine-point Sharpie
Steel block with ball peen or planishing hammer & rawhide or nylon hammer
Pliers: flush cutters, flat-nosed pliers, and stepped bail-making pliers with 2mm, 5mm, 7mm, and 9mm steps.
File, sandpaper, and polishing cloth
Ring mandrel
Video Tutorial
A full-length video tutorial is linked below, along with written steps and photos of each stage of the project. Time stamps to the appropriate location in the YouTube video are included in each step below, so if you get stuck on one step, you can quickly jump to the video explanation.
Step One: Form the Outer Elements


Click here to go to this step in the YouTube video.
Measure and mark the middle of all four 18-gauge square wires.
Start forming the first outer element by placing the mid-mark of a 5.5” length in your stepped bail-making pliers. Use your flat-nosed pliers to pull each wire end around the 9mm step, creating a 90-degree cross.
Do the same for both 5.5” lengths. For the second element, cross the opposite side over top as you did the first. This will ensure that your earrings are mirror images of each other.
Use a ring mandrel to form the lower half of the outer elements. Place the element at ring size 7.
Fold the wire ends around the ring mandrel, taking care not to twist the wire. You want to keep the same side of the square wire facing up at all times.
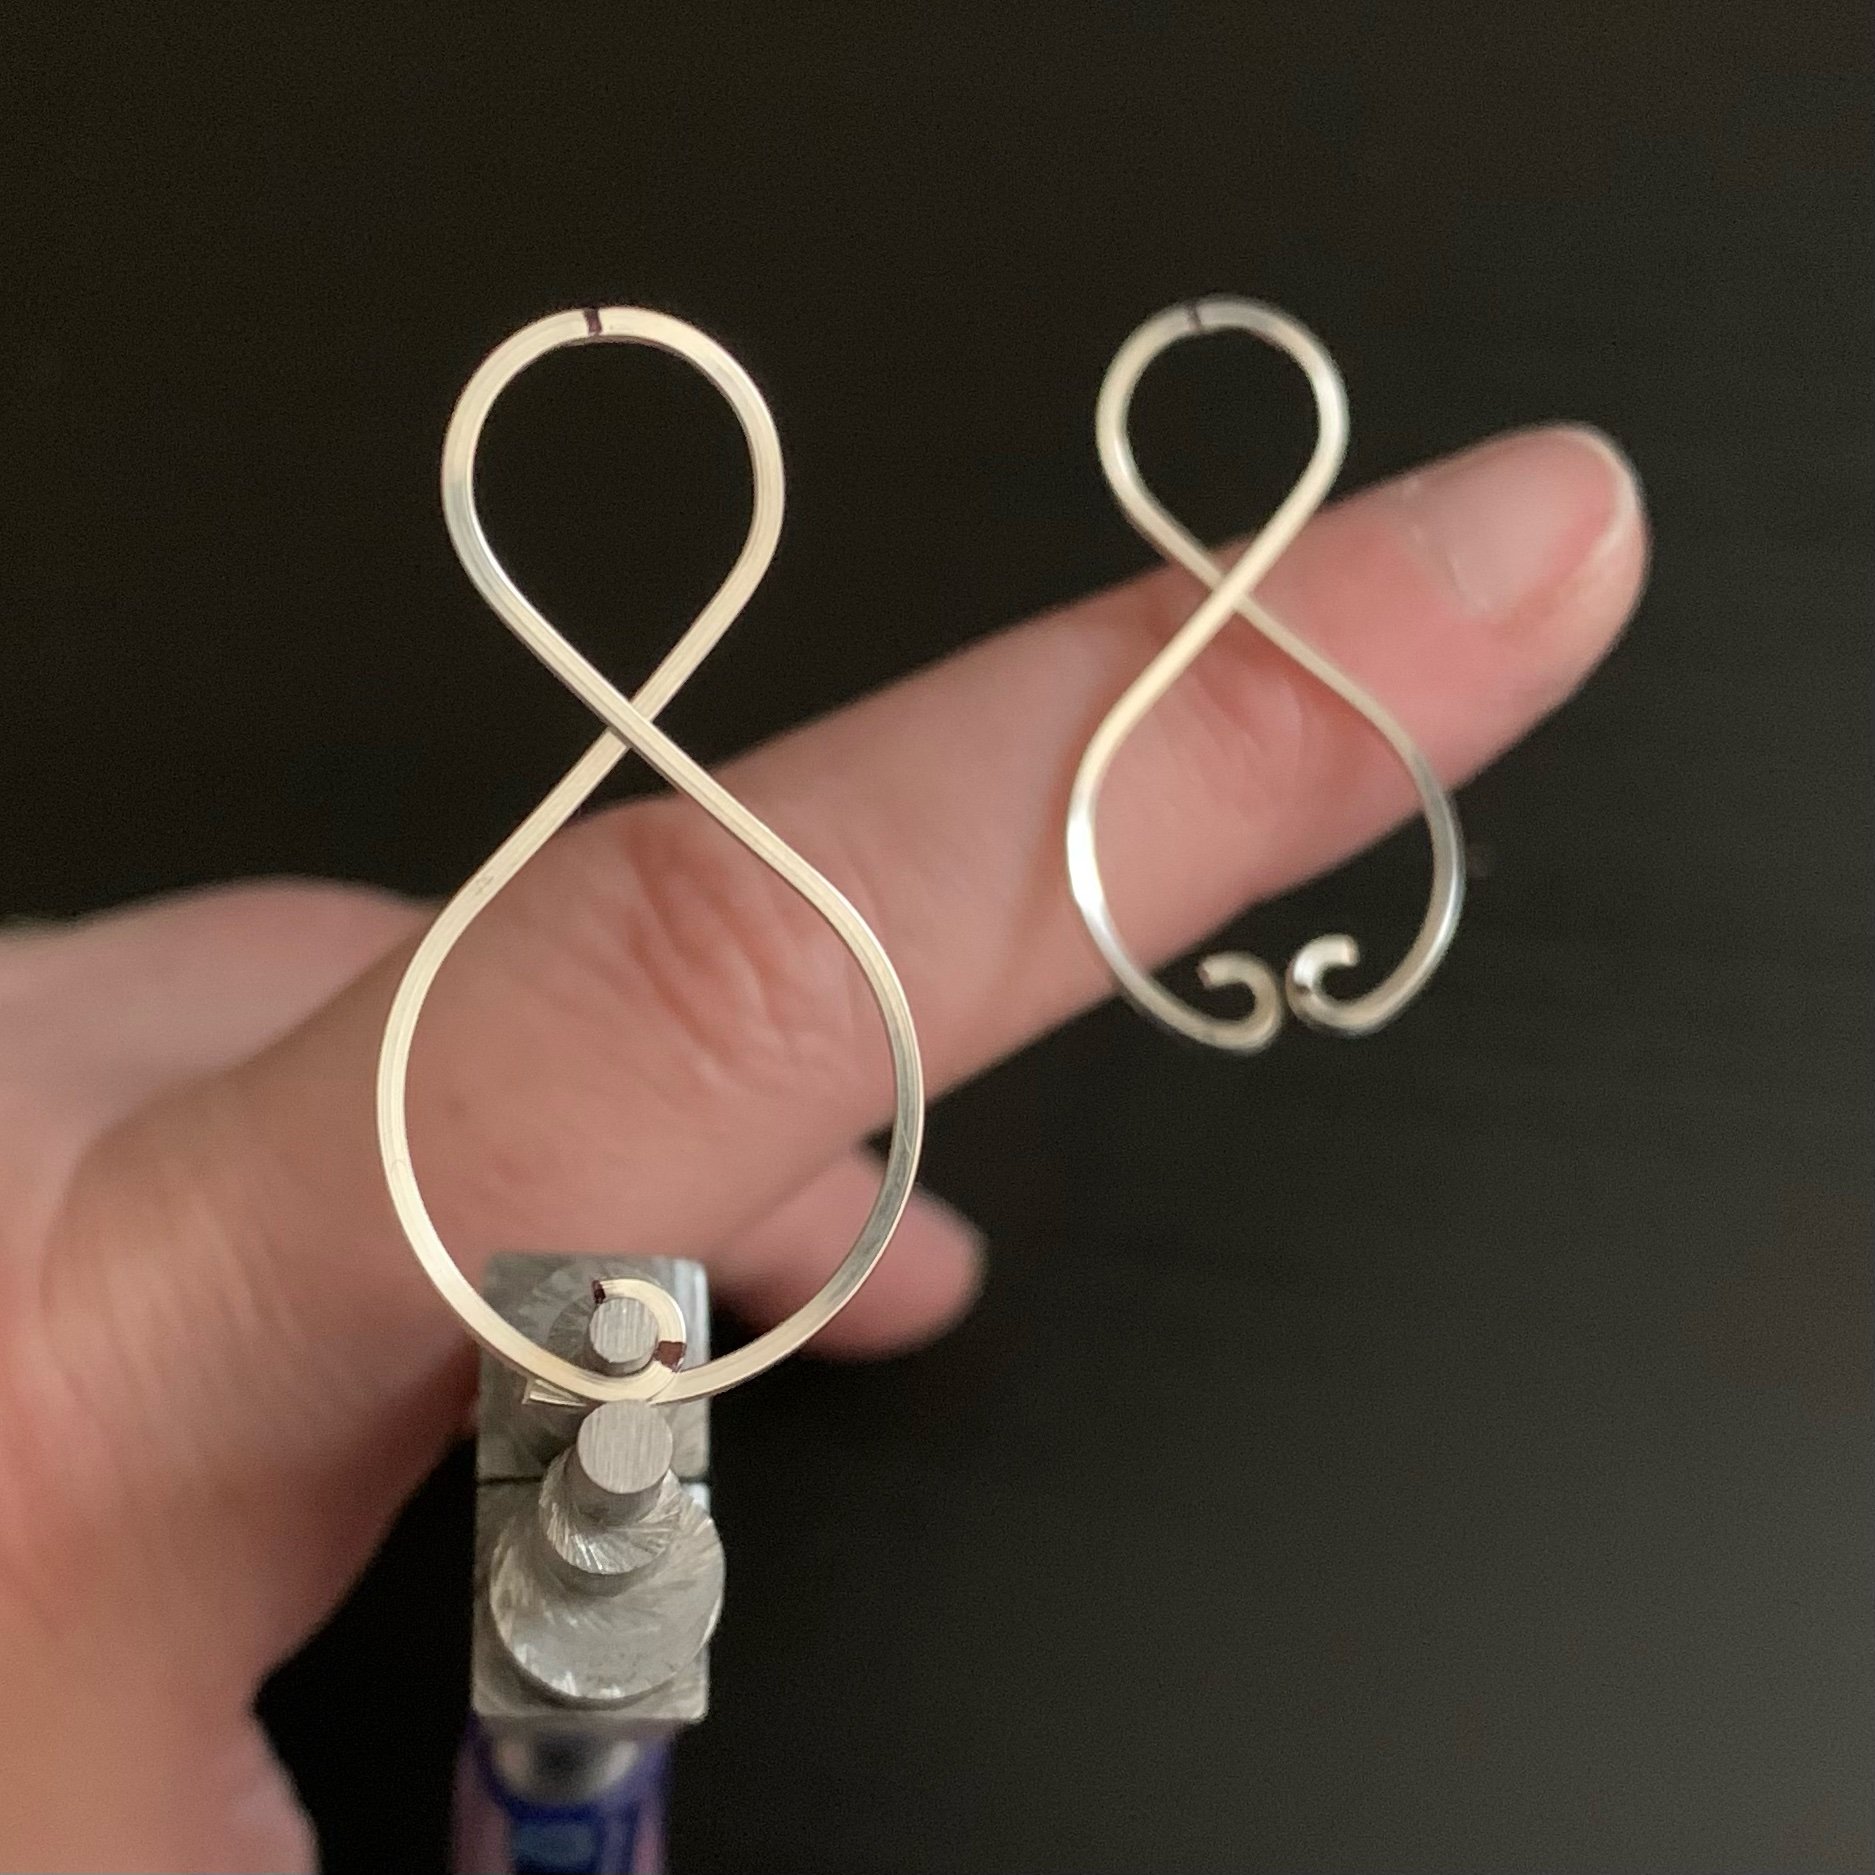
Repeat for the other element. You should now have two mirror-image figure 8s.
Step Two: Form the Outer Element Loops


Click here to go to this step in the YouTube video.
Mark the center bottom of each outer element, then measure & mark a spot 4mm past center, toward the tail.
Use flush cutters to cut the spot 4mm past center on each side of each outer element.
Use the 2mm step of the bail-making pliers to curl the cut ends upward. You’re not going to make a complete circle; rather stop at about 2/3 of the way, leaving 1/3 of the circle open.
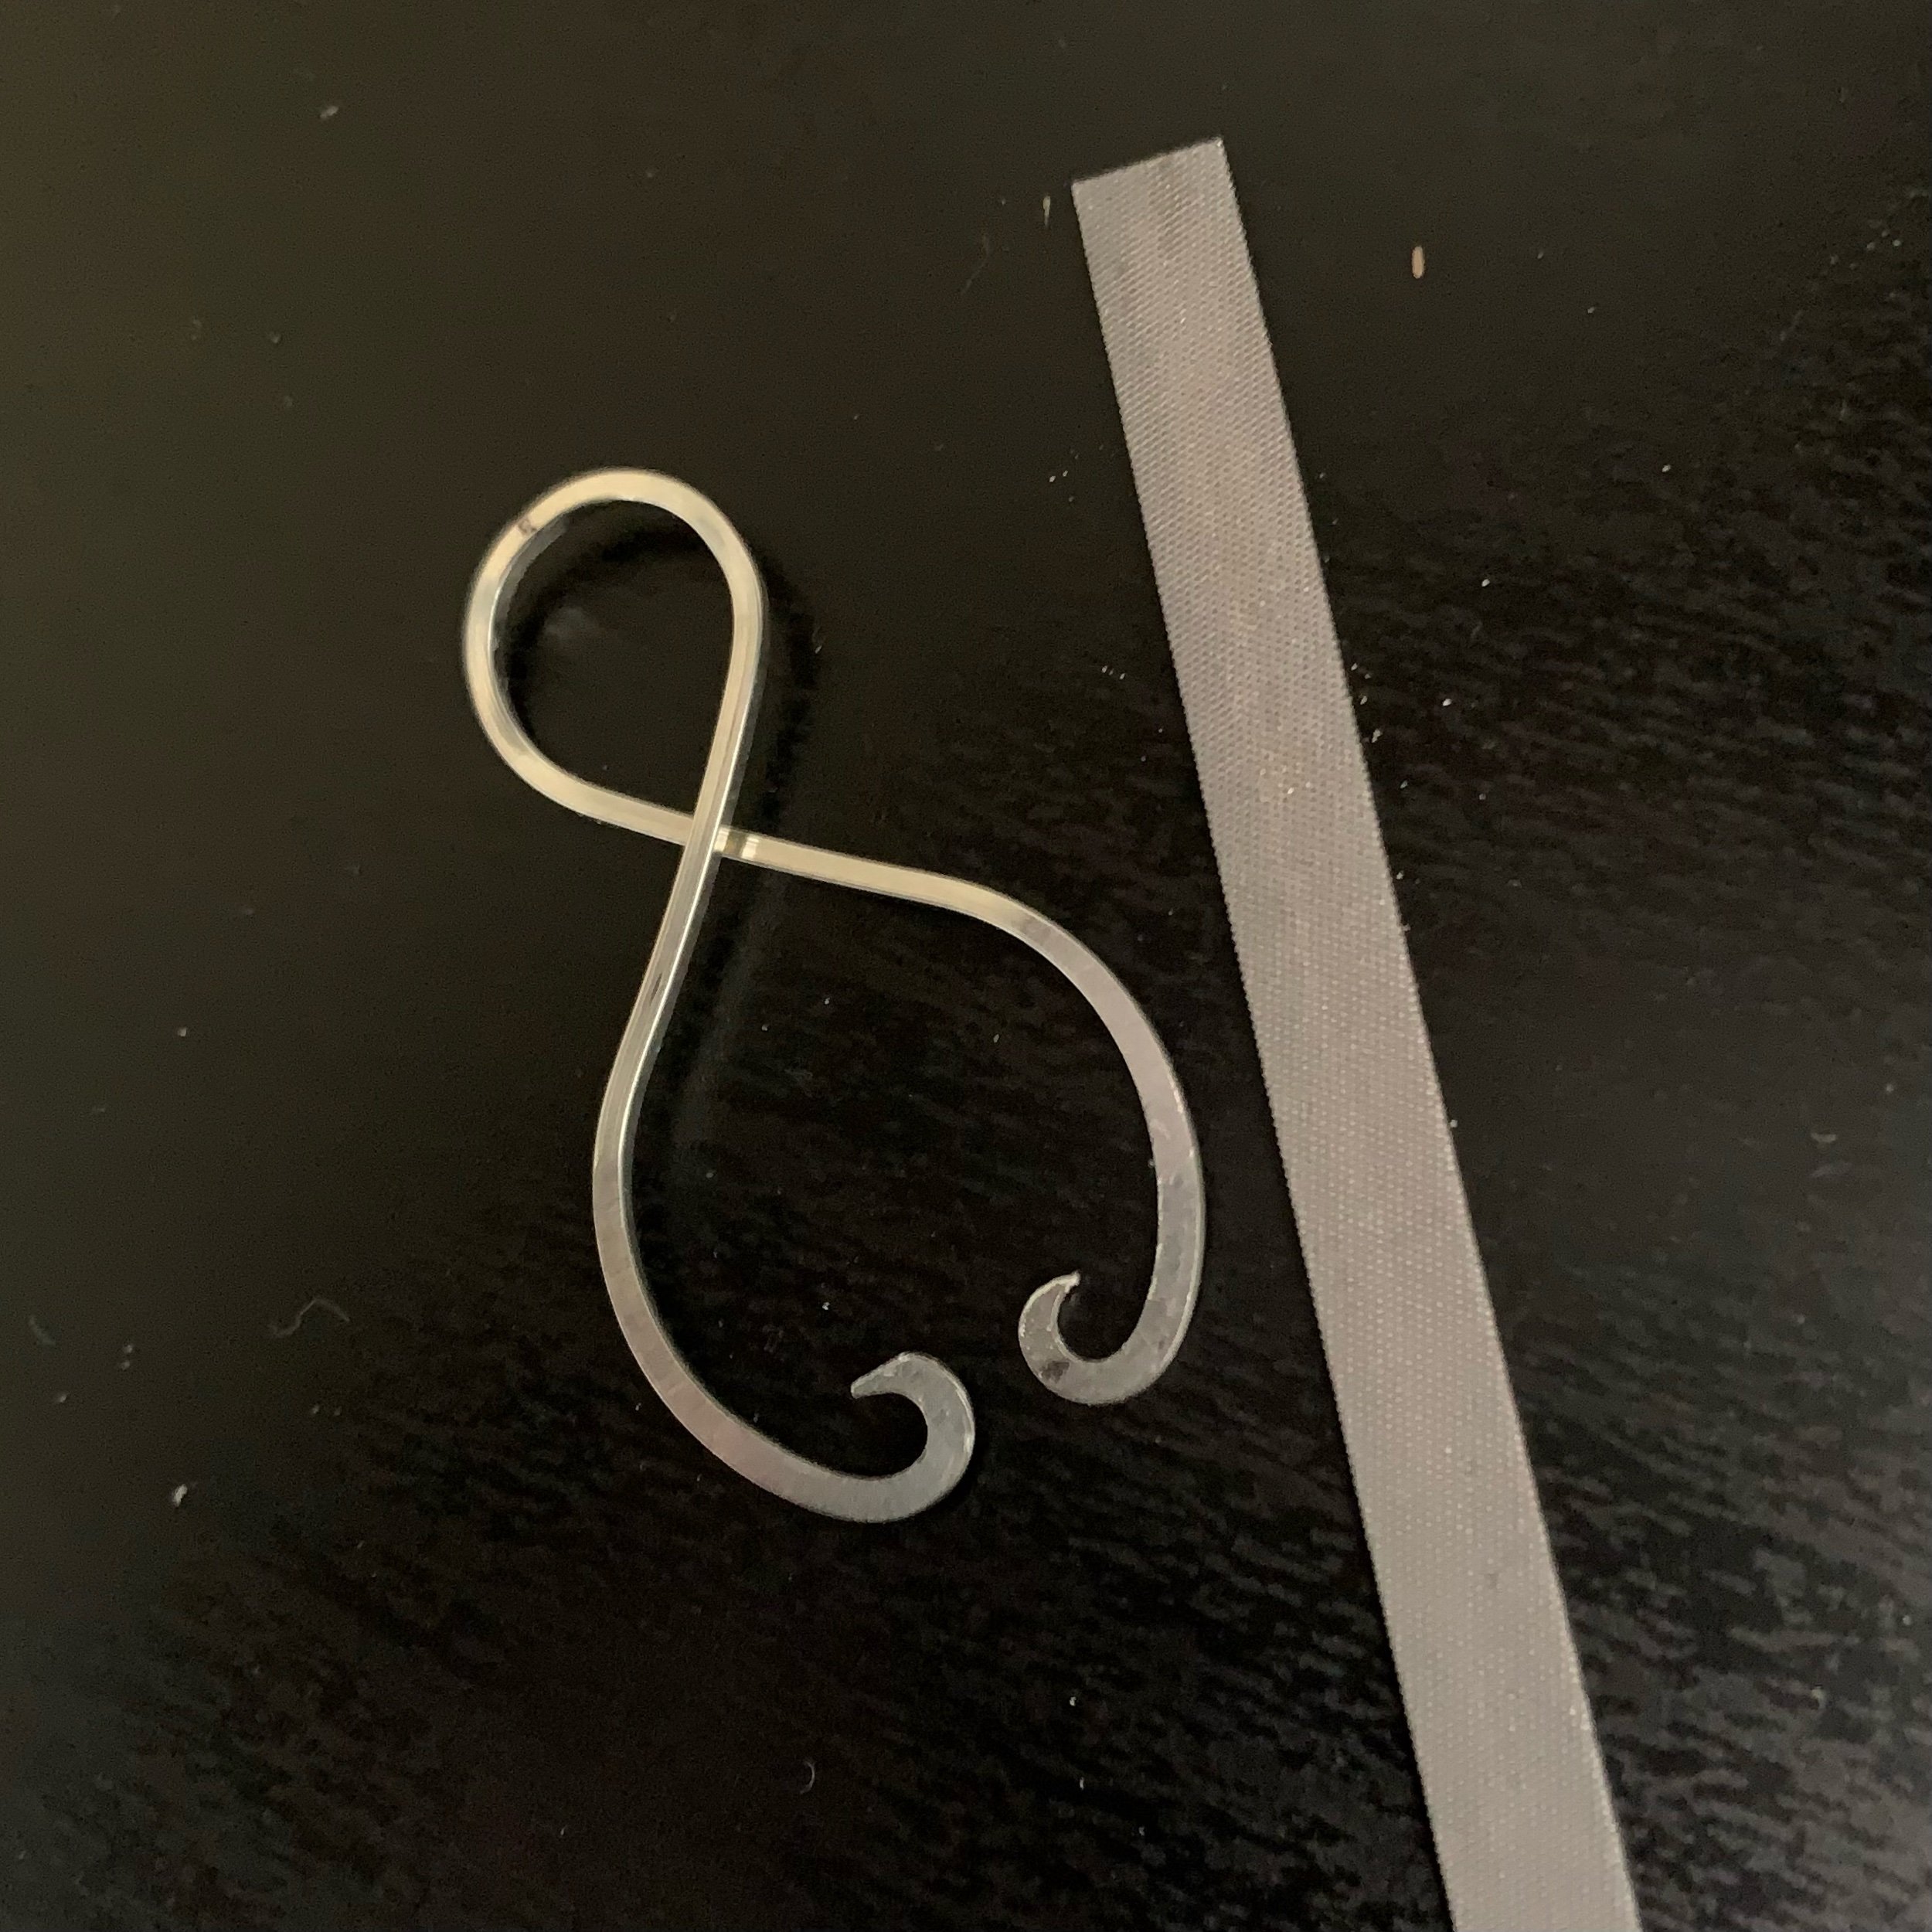
Repeat for both elements. The bottom loops should just touch each other at the center bottom.
Step Three: Finish the Outer Element Loops & Hammer


Click here to go to this step in the YouTube video.
Hammer the bottom half of each outer element. Don’t hammer too close to the center cross.
Cut a triangle off the top of each outer-element bottom loop using your flush cutters. This reduces the amount of filing and sanding needed to create a clean, graduated curve.
File the bottom loops to shape. I find it helpful to hold the piece with my flat-nosed pliers and start by filing down the little nub left by the flush cutters.
File and sand all four loops until they are smooth on all sides, the ends aren’t too pokey, and the curls don’t have any blunt ends.
Hammer the top half of the top loop of each outer element. Do not hammer the place where the wires cross in the middle.
Step Four: Form the Inner Elements


Click here to go to this step in the YouTube video.
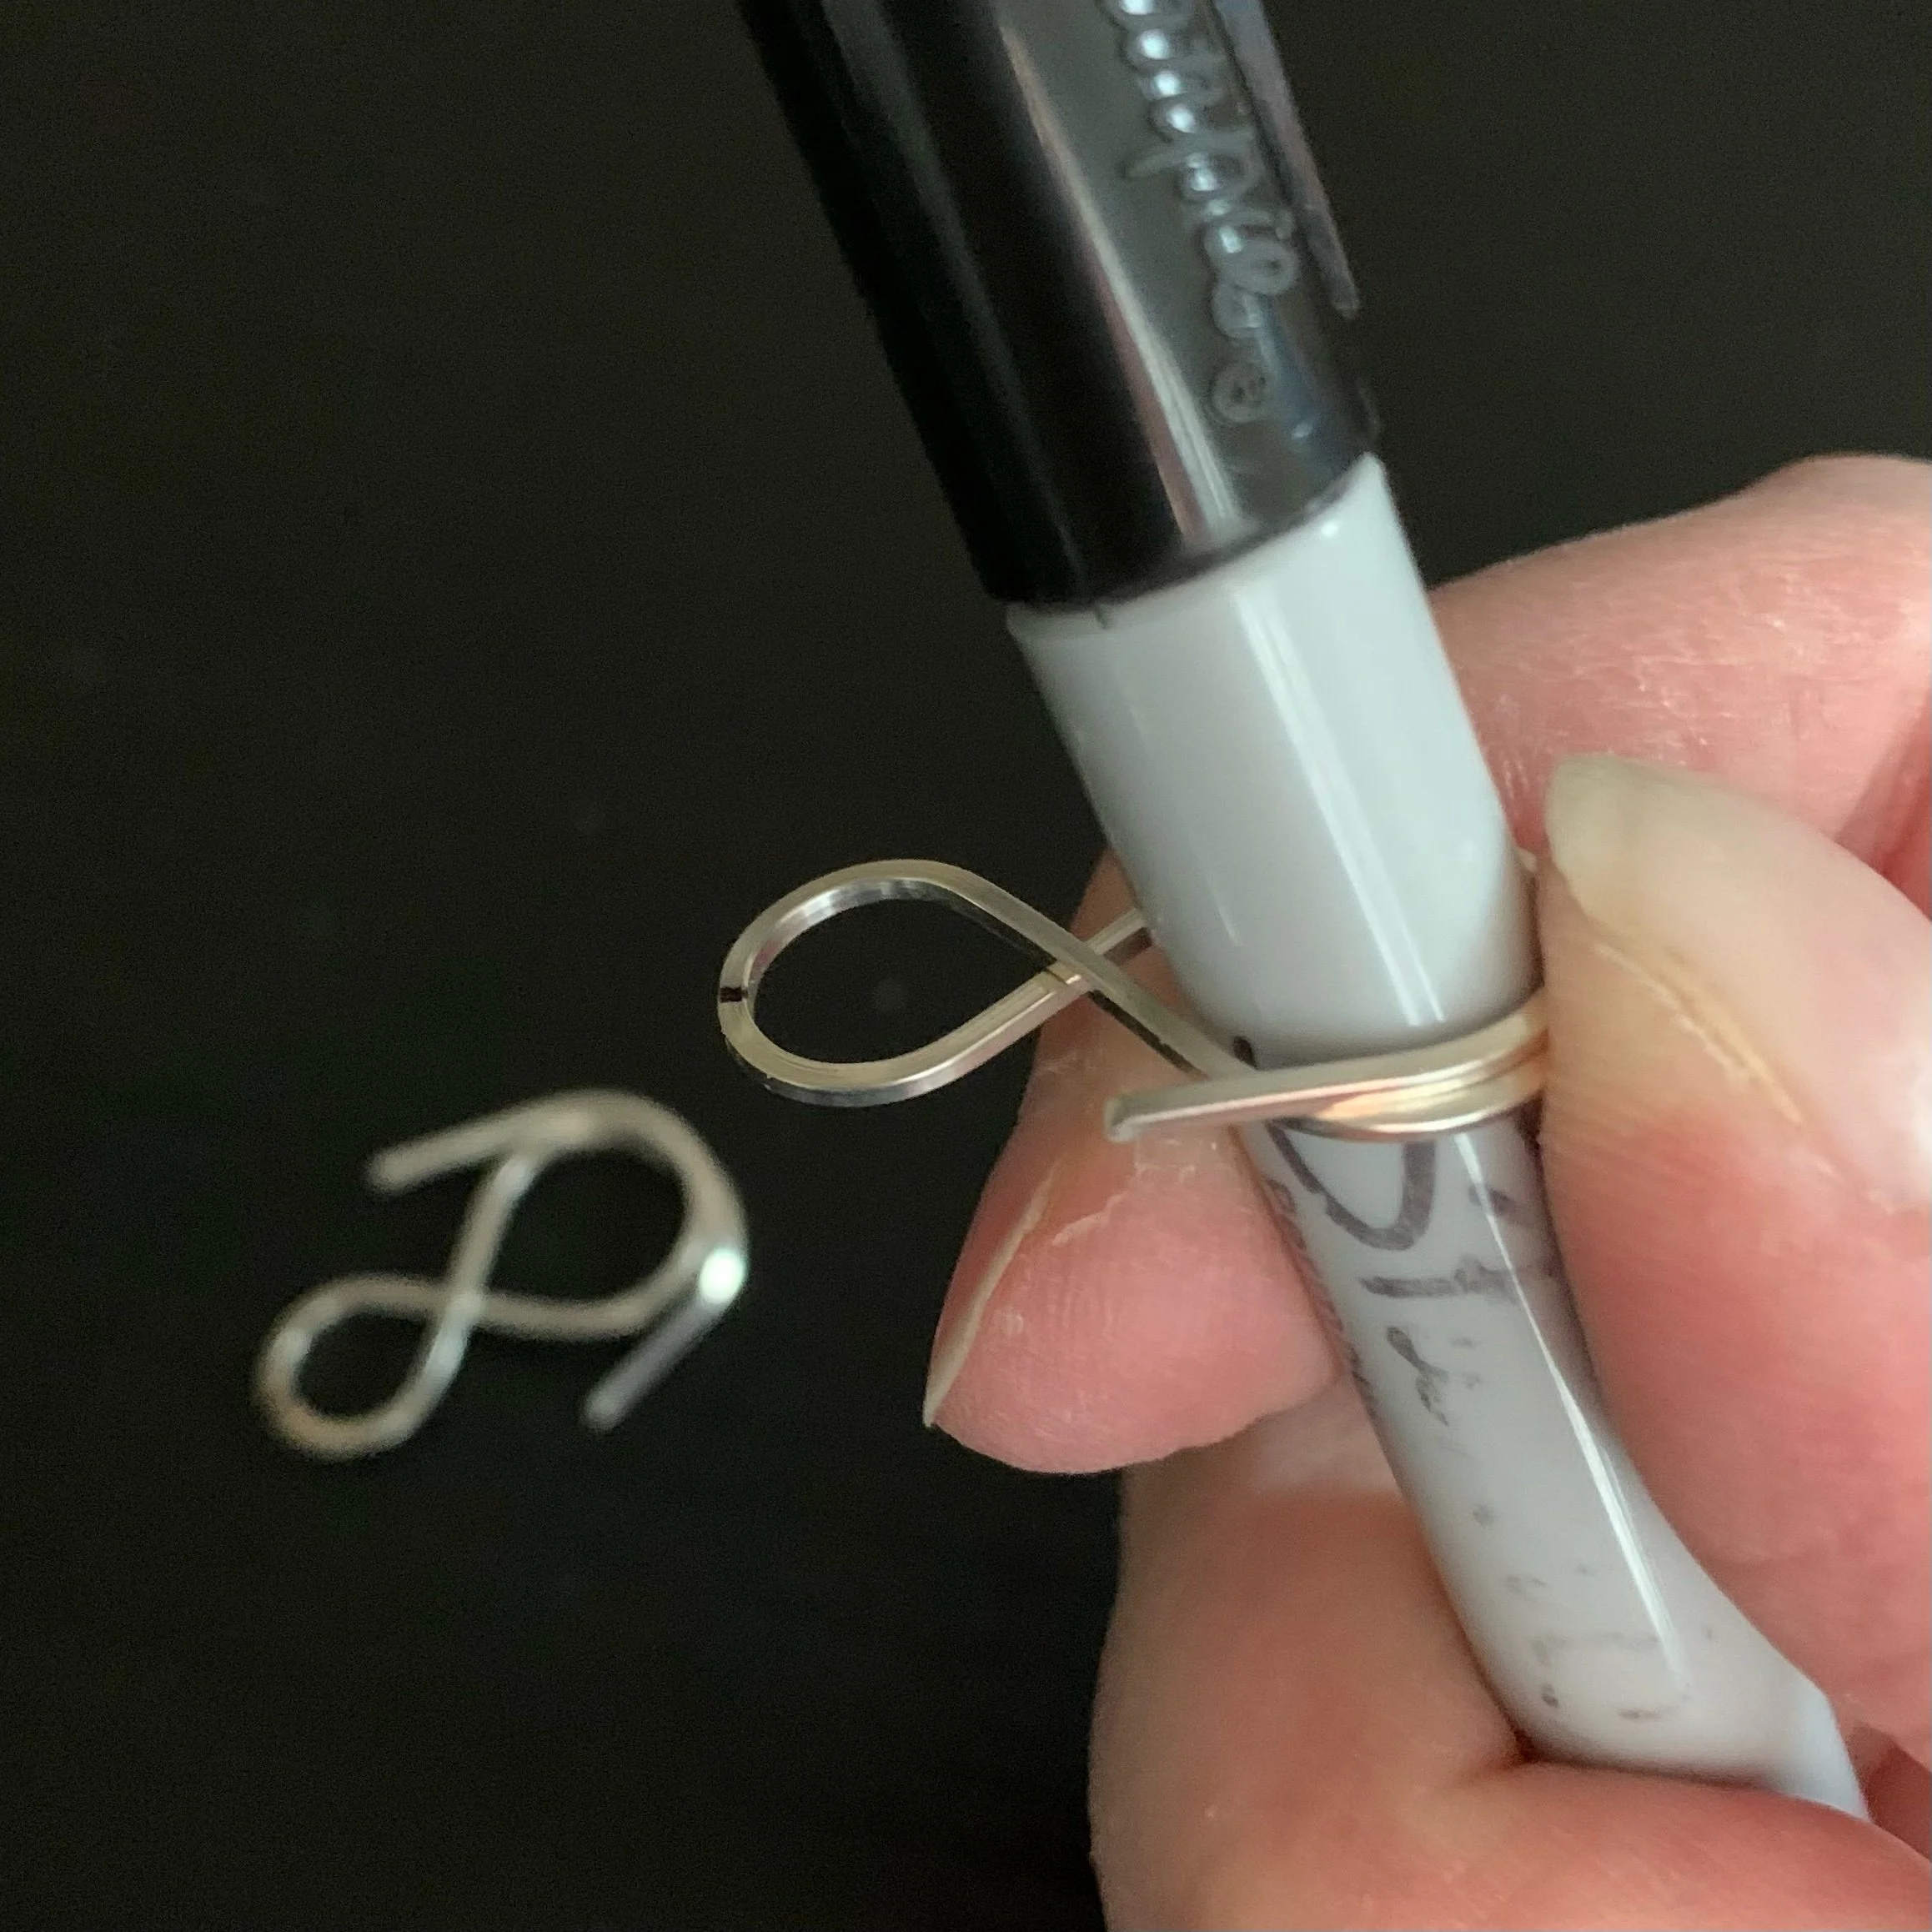
Form the inner elements from the 4” lengths of 18-gauge square wire. Follow the same technique as you did for the outer elements, except use the 7mm step on the bail-making pliers to form the top loop. Remember to cross the right wire over the left wire on one element, and cross the left wire over the right wire on the other. You want identical pieces that are mirror images of each other.
Use an approximately 1cm-sized mandrel or dowel to form the bottom circles of the inner elements. The shaft of your fine-point Sharpie works well for this.
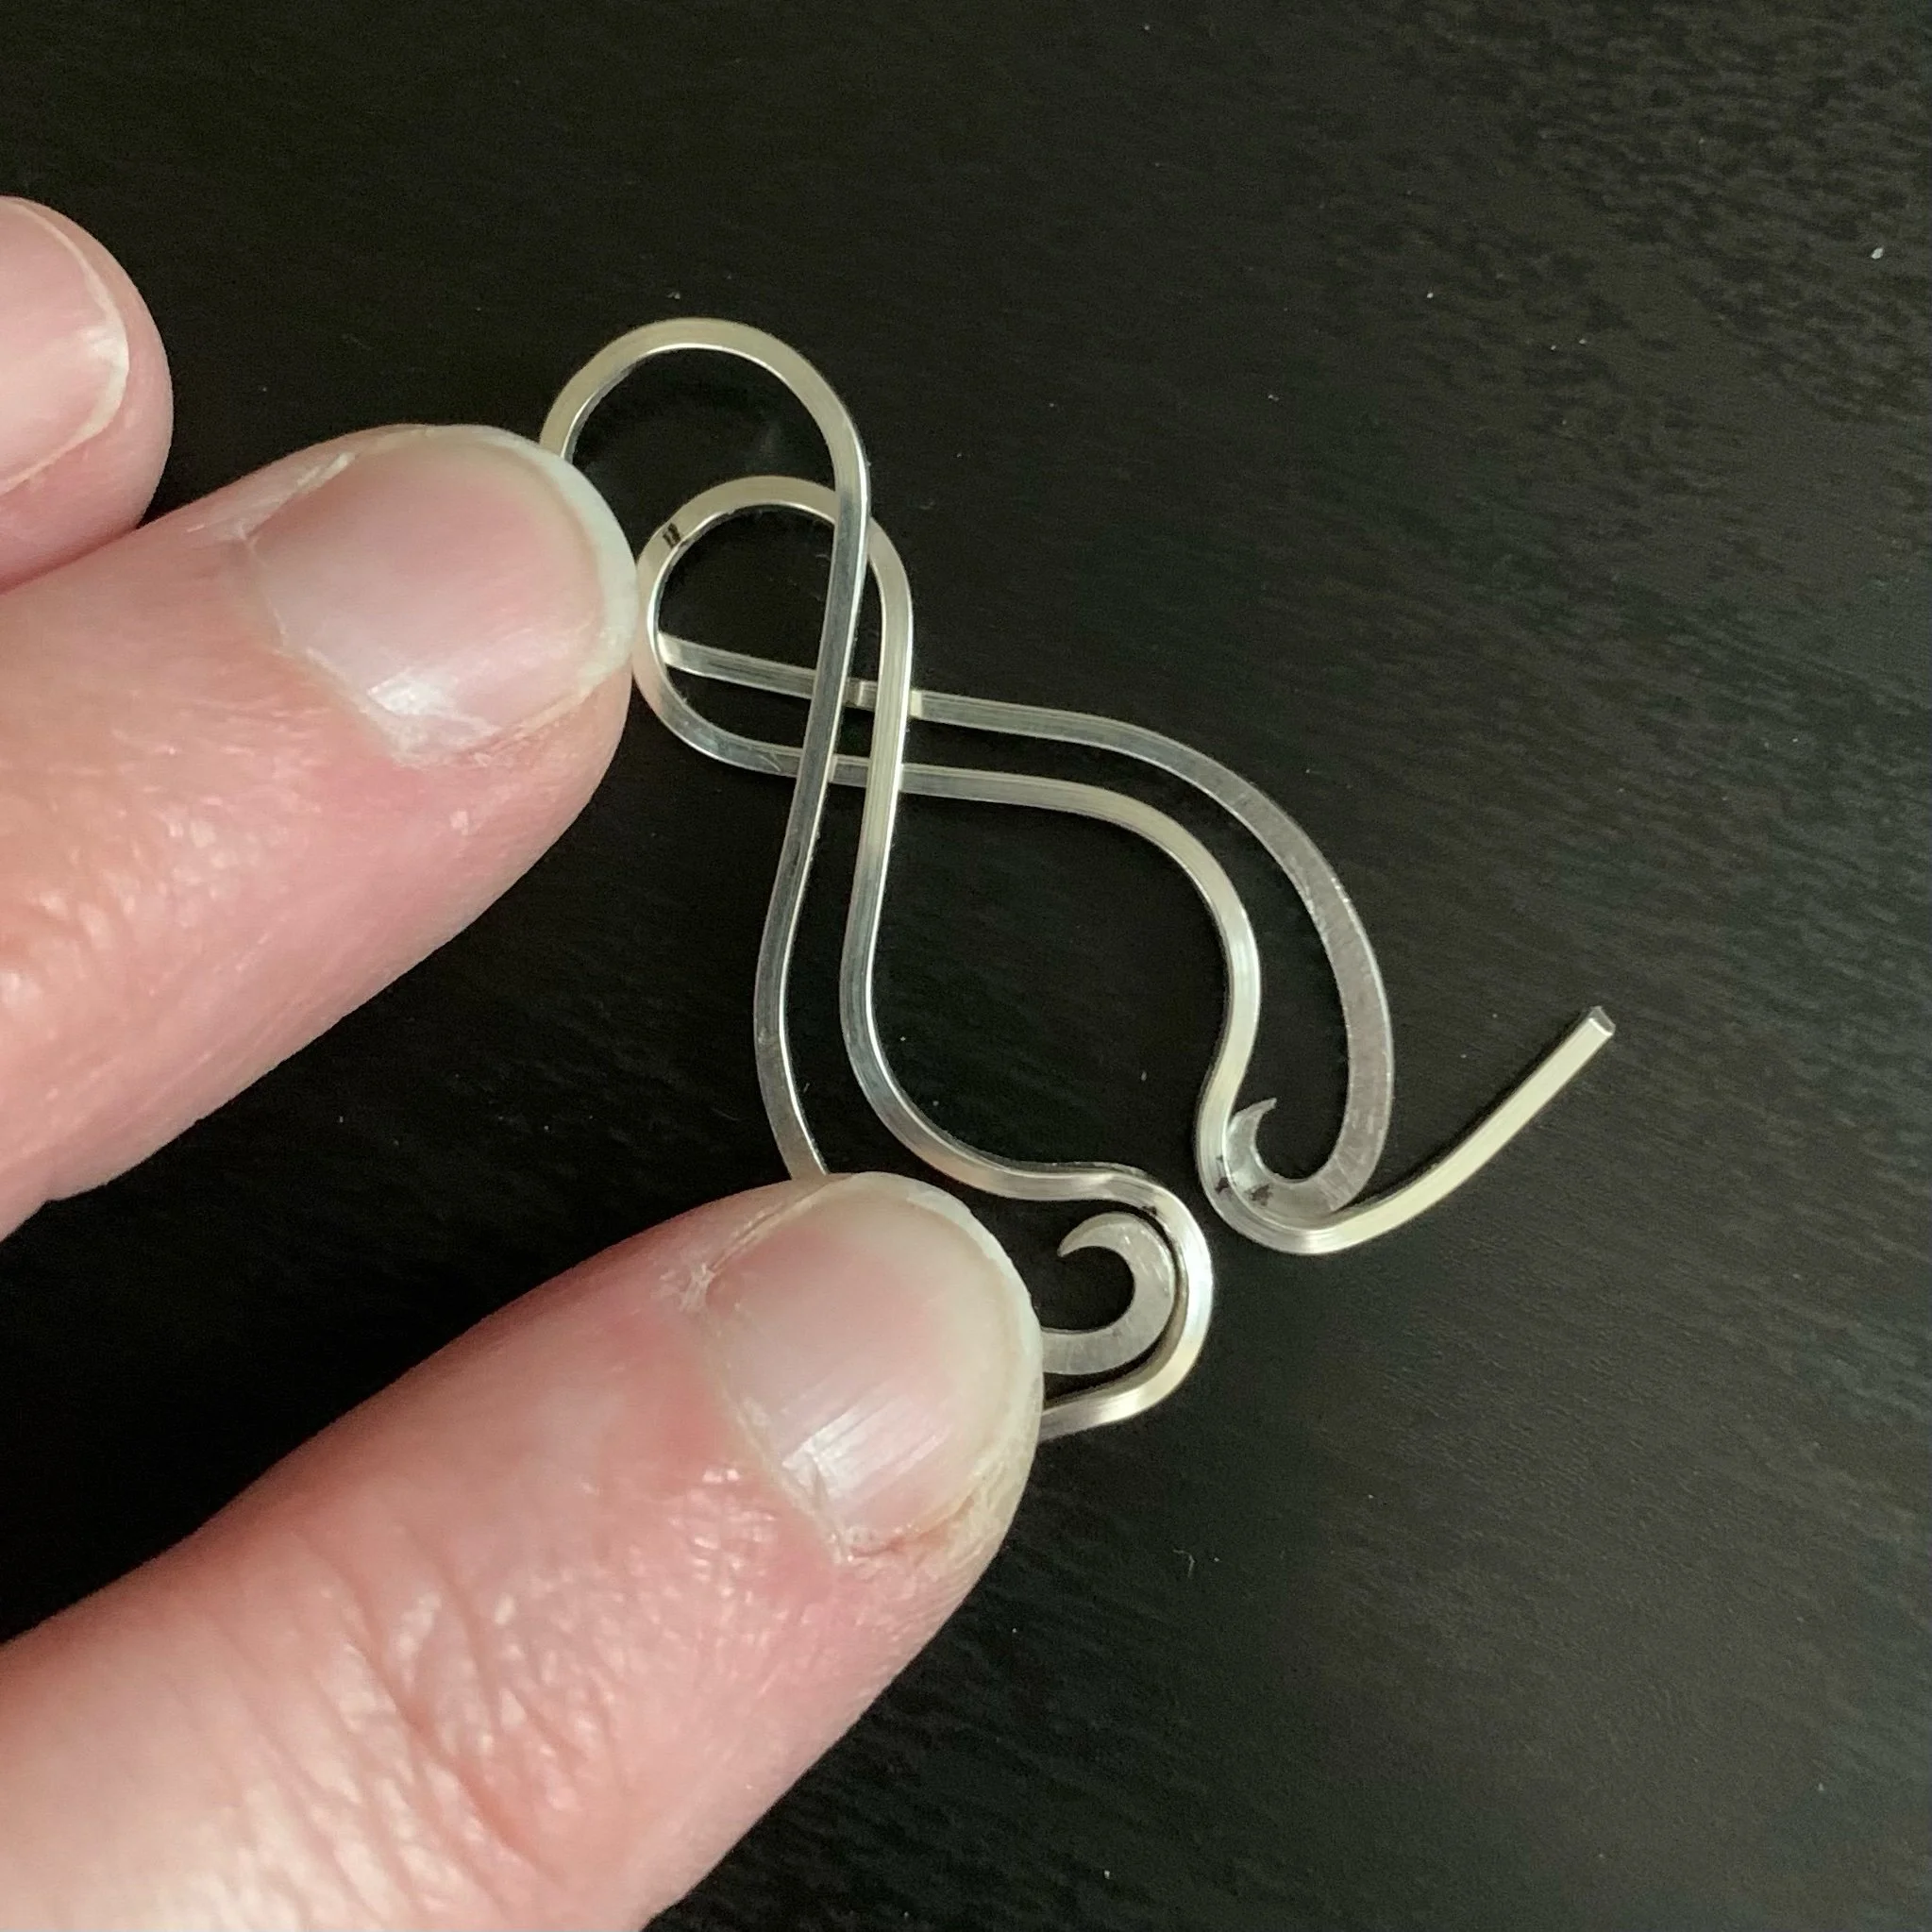
Fit the inner pieces into the outer elements. The pieces fit together by separating the cross on the outer elements and sliding the inner element between. Mark the bottom center of each inner element with your Sharpie, using the bottom loops of the outer element as a guide.
Use the 5mm step of your bail-making pliers to grasp one side of the bottom middle mark on an inner element. You don’t want to grasp centered on the Sharpie mark because this will cause your curve to start too late.
Use your flat-nosed pliers to pull the tail around the 5mm step. Create a half-circle and end with the tail pointed outward.
Step Five: Fit and Attach the Inner & Outer Elements


Click here to go to this step in the YouTube video.
Now re-fit the inner element into the outer element. The 5mm curve should fit nicely around each 2mm loop. Adjust as needed, paying attention to the way the two elements intersect in the middle of the piece, as this is your main design focus.
Once you are happy with how the two pieces fit together, grasp the bottom of the two elements and use a rawhide or nylon mallet to hammer the middle intersection of the two pieces. This will create divots in both wires that gently lock the elements together.
Turn the piece around now that the elements are locked together, and use your planishing or ball peen hammer to flatten the bottom half of the elements. You’re primarily hammering the inner element at this point, since the bottom half of the outer element has already been hammered, so it’s a bit thinner than the inner element.
Bend one of the 22-gauge half-round length into a U shape, flat side in, and hook it to the bottom of the earring, across all four wires. Choose a front and back of the earring, and ensure this loop goes across the back of the earring.
Put the earring down on your working surface so the two half-round wire ends stand up. This will be the front of your earring. Tightly cross the two ends of the half-round wire across the face of the earring, ensuring that all four inner & outer element wires are flat next to each other (not on top of each other) and tightly bound with no space between. Use your flat-nosed pliers to crimp the half-round wrapping wires into place.
Feed each end of the half-round wires through the earring and flip the piece one more time. You are now looking at the back of the piece. Tightly cross the wires again, and use your flat-nosed pliers to crimp these wires into place. The front of the earring has two wraps, and the back of the earring has three wraps.
Step 6: Finish the Connected Elements


Click here to go to this step in the YouTube video.
Trim the tails of the inner element using your flush cutters. Do this at an angle, following the outer curve of the earring.
Use a file to shape the bottom tails to gentle curves with no blunt edges. Use sandpaper as well if needed.
From the back of the piece, pass the bottom half-round wire end through the space and face the flat side toward the piece. Pull the top half-round wire down diagonally across the wraps toward the bottom of the piece.
Wrap the half-round wires around the bottom curve of the outer element three times, ending at the back of the earrings.
Clip the half-round wires using your flush cutters, then use your flat-nosed pliers to press them down on the back of the piece.
Repeat for both earrings. Check for any pokey elements by running your finger along the bottom edge of the earrings. You should not feel any catches or rough spots. If you do, fix this with sandpaper.
Step Seven: Create & Attach Ear Wires


Click here to go to this step in the YouTube video.
Create a simple pair of ear wires using the two lengths of 20-gauge round wire. Start by forming a 2mm loop on one end of each wire.
Next, form a 7mm loop facing the opposite direction from your first loop. Make about a 2/3 circle, leaving 1/3 open.
Optionally, hammer the front portion of the 7mm loop. Don’t hammer too far up toward the top of the ear wire, as this part will go into the ear and a round wire is more comfortable in a piercing than a flattened or hammered wire.
Use the 9mm step to create a small, outward-facing bend in the ends of the ear wires.
Sand the wire ends that will go into the ears. Feel these with your fingertips to ensure they are fully smooth with no pokey bits.
Attach the ear wires to your earring elements. Polish and wear for daytime or evening events!